
 You’ve wanted to try it, now is your chance. Canning allows you to capture the best flavours at the peak of the season and enjoy the taste of garden-fresh produce in the middle of winter. Many of our Geranium homes offer optional cold storage rooms, ideal for keeping all the fruits of your labour close at hand. Now that you’ve got what you need to give canning a try, grab a few jars and some new canning lids and let’s get preserving!
Water Bath Canning
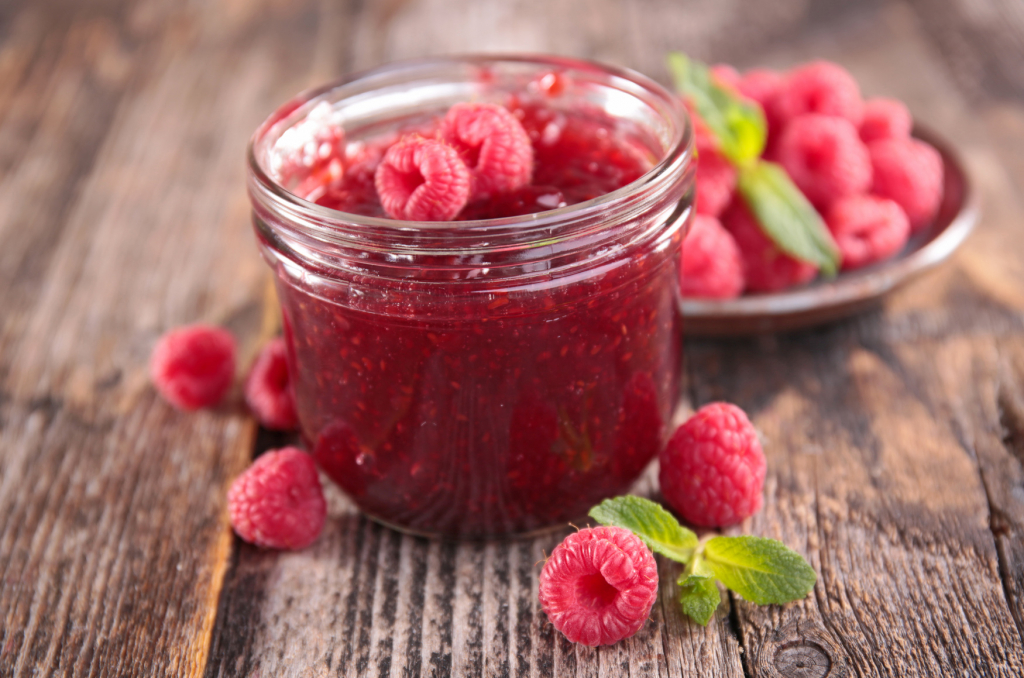
If you’re just starting out…this is the method for you. It’s a lower-temperature canning process ideal for high-acid foods. This method is recommended for fruits, jams and jellies, salsas, tomatoes, pickles and relishes, chutneys, sauces and pie fillings.
Pressure Canning
Pressure canning is the only canning process that reaches the high temperature (240°F) needed to safely preserve low-acid foods like meat, poultry, vegetables, chili and seafood. Pressure Canning is for the more seasoned canner. Should you wish to learn more about this process see the information here.
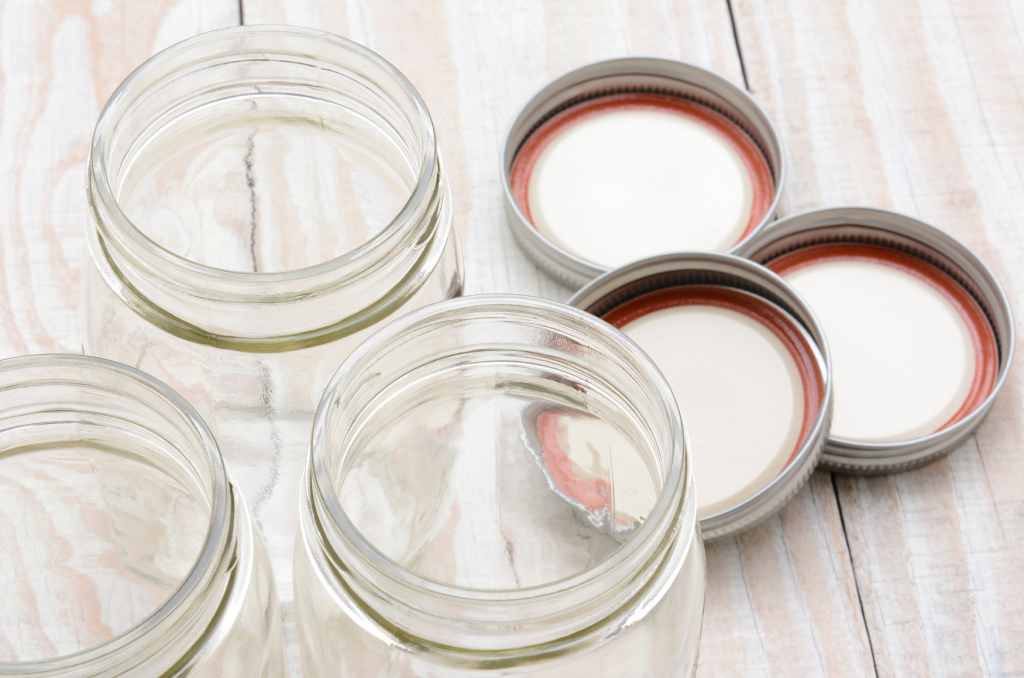
It’s important to always use new lids to ensure a good seal
Step 1: Get Your Materials
Canning Jars, Lids and Screw Bands: It’s recommended to use new, however if you wish to reuse jars and screw bands, discard any with nicks or cracks. Always use new lids to ensure a tight seal.
Canning Pot: Use a pot with a fitted lid that is large enough to fully immerse the jars in water by 2 inches, and allow the water to boil when covered.
Canning Rack: This is needed to keep jar bottoms slightly elevated and not too close to the heating element. It also allows the boiling water to come into contact with all surfaces of the jar. A cake cooling rack would do. Here are some more alternatives that can work in a pinch.
Jar Lifter: You will need a lifter to remove the jars safely.
Ladle and/or Funnel: depending on what you’re canning, to put the food into the jars.
Bubble Tool: This helps remove air bubbles before sealing your jars.
Clean Towels: To put your filled jars on, to cool.
Ingredients: Always use fresh produce in peak condition. The whole reason for canning is to enjoy fresh fruit or vegetables throughout the year. Follow your recipe for all ingredients needed.
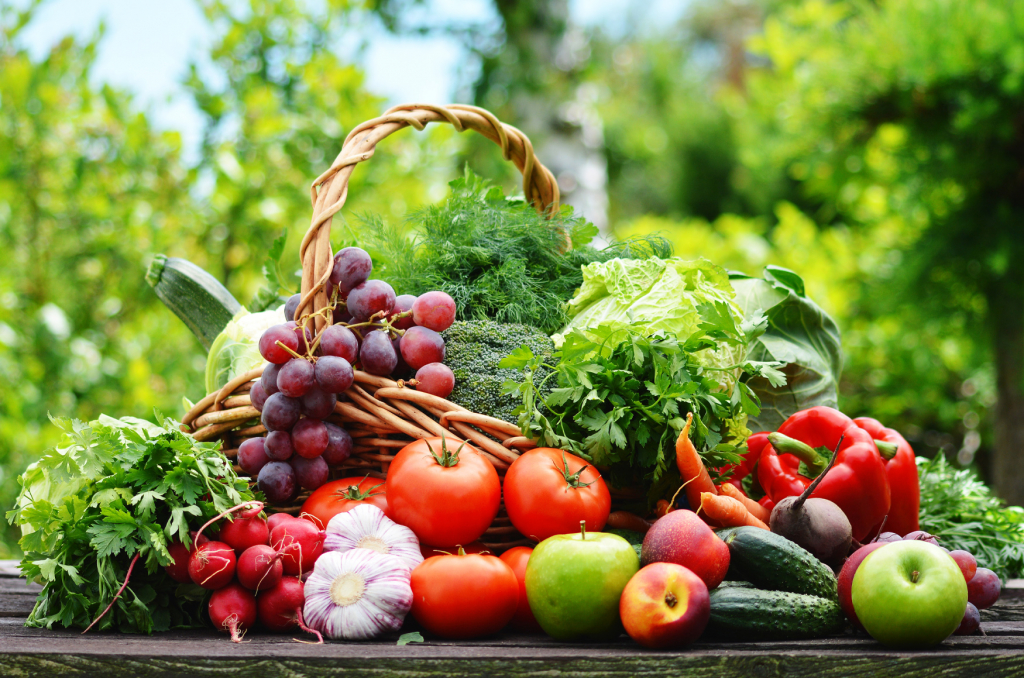
Choose fresh fruit and vegetables in season at their peak
Step 2: Prepare Your Jars and Canning Method
To sterilize your jars and lids, boil them in a large pot of water for at least 10 minutes. Make sure the jars and lids are fully submerged in the water. Keep your jars hot until ready to fill them to avoid cracking when adding hot food to your jar.
Next, set your bottle rack on the bottom of your canning pot. Fill it about halfway with water and keep it at a simmer, covered, with your empty jars inside.
Step 3: Choose Your Recipe
Choose a recipe that you feel comfortable with. Follow the recipe instructions carefully to ensure that your food is cooked and seasoned properly. Here are some tried and true canning recipes for beginners: link. Looking for the perfect pickle? Give this recipe at try!
Whether it’s a favourite recipe or something new, be sure to follow the directions precisely
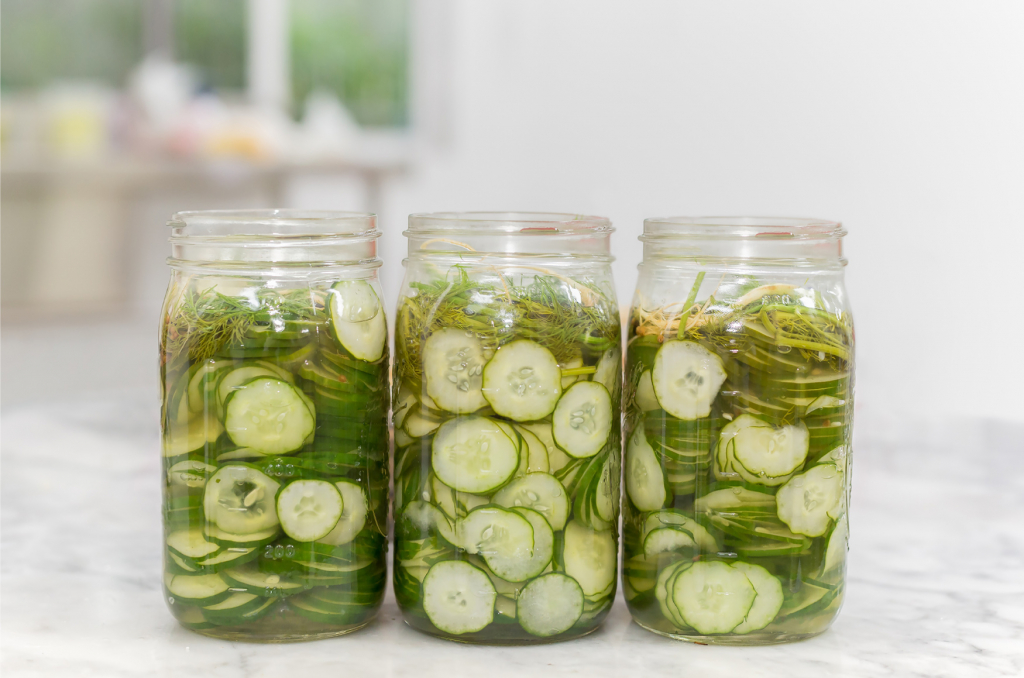
Step 4: Fill Your Jars
Fill the jars while they are still hot. Using a funnel and ladle, carefully fill your sterilized jars with your prepared recipe. A bubble tool will help to release any air bubbles that may be trapped inside the jar. It’s important you leave room at the top for closing; if jars are filled too high, the lids won’t seal properly. Wipe the jar and rim. Place the lids on top of your filled jars, and screw on the rings tightly. Make sure that the lids are centered and fit snugly on the jars. The Food Network offers a great visual guide to these steps.
Step 5: Process Your Jars
Place your filled and sealed jars into your large pot with a rack. The water should cover the jars about an inch or two. Bring water to a boil and let it process for the amount of time indicated in your recipe. When time is up, turn off the heat and let the jars cool in the canner for about 5 minutes. Then, use a lifter to remove the jars and place them on a clean towel to cool completely.
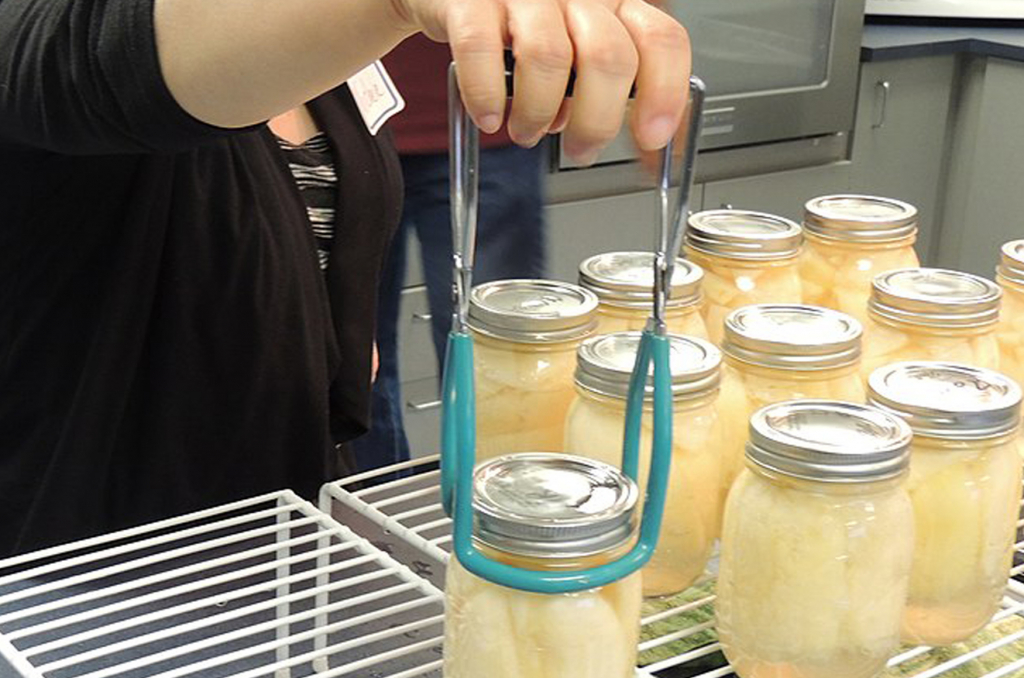
Use a lifter for safe removal of your jars from boiling water
Step 6: Cool and Store
Leave your jars on the counter for about 12- 24 hours. As the jars cool, you’ll hear the lids make a popping sound, indicating that they have sealed properly. After the cooling time check for proper sealing. When you press down on the lid there should be no flex. Next, remove the bands. If the lids remain attached, it’s sealed properly. Removing the bands is good as any water stuck under the band will cause rusting. If any lids failed to seal, the food is still good. Just put it in the refrigerator to use first. Store your jars in a cool, dry place until you’re ready to use them. Stored properly, your canned fruit and vegetables can last a year.
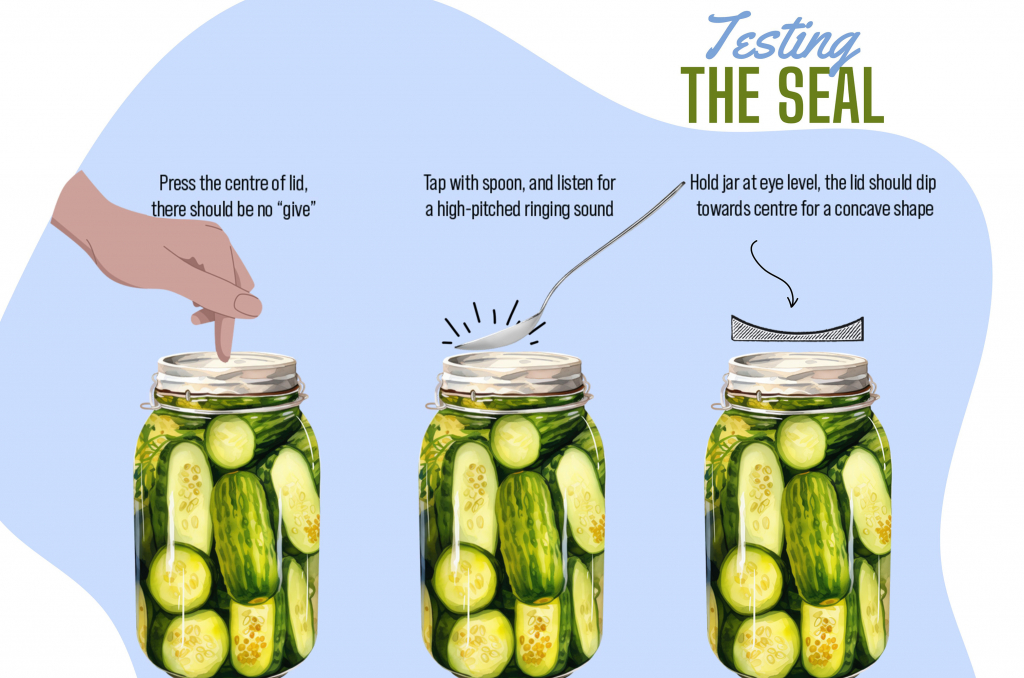
It’s important to test the seal of your jars once cooled
Cold Storage
Our homes in Midhurst Valley and Allegro Aurora offer optional cold storage rooms, perfect for your many canned food delights. Cold Cellars are typically used to store wine, potatoes, canning, flower bulbs, and other items that need to be kept at a cooler temperature. Not only do they provide the perfect space to house these items neatly and safely, but they are much cheaper than running an extra fridge. Ask about our Cold Cellars in our Allegro and Midhurst Valley homes.
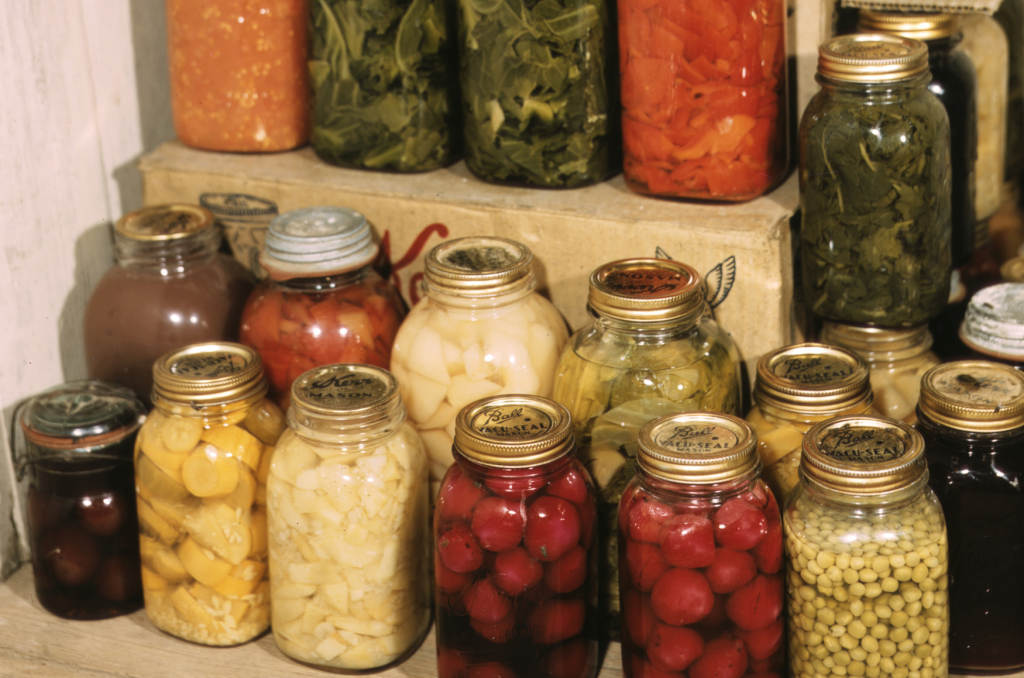
A cold storage offers an ideal place to store all your canning
Canning not only allows you to preserve your favourite foods, but it’s also fun to share them with friends and family. It also makes for great housewarming gifts.
Homemade preserves make a great welcome gift